Router on a stick is how you route between VLANs when you’ve only got one router interface to spare. You split that single physical port into logical subinterfaces, give each one an IP address and a VLAN tag, and turn the switch uplink into a trunk. One cable, every VLAN.
That’s the whole idea. The config takes about twelve lines.
What takes longer is getting it to actually pass traffic. So this guide gives you the working config first, then the part every other tutorial skips: the native VLAN line, the five things that break it, and the point where you should stop using router on a stick entirely.
What does a router on a stick actually do?
VLANs split one switch into separate broadcast domains. A device in VLAN 10 can’t reach a device in VLAN 20, even if they’re plugged into ports right next to each other. That’s the point of a VLAN. If you’re fuzzy on why, start with what a VLAN actually is and come back.
But separation isn’t isolation. Your staff VLAN still needs the file server in the server VLAN. Something has to route between them, and switches don’t route. Routers do.
Router on a stick is the cheap answer. Instead of burning one router port per VLAN, you run a single trunk link from the switch to the router and let the router handle all the VLANs over that one wire. The “stick” is that cable.
The router sees each VLAN through a subinterface, a logical interface carved out of the physical one. Each subinterface holds the default gateway address for its VLAN. Each one is tagged with a VLAN ID using 802.1Q encapsulation.
Here’s the part that trips people up on day one: the VLAN and the subnet are the same boundary, seen from two layers. VLAN 10 is one broadcast domain and 192.168.10.0/24 is one subnet, and they describe the same group of hosts. Our breakdown of VLAN and subnet mapping one to one covers why that relationship has to hold before any of this works.
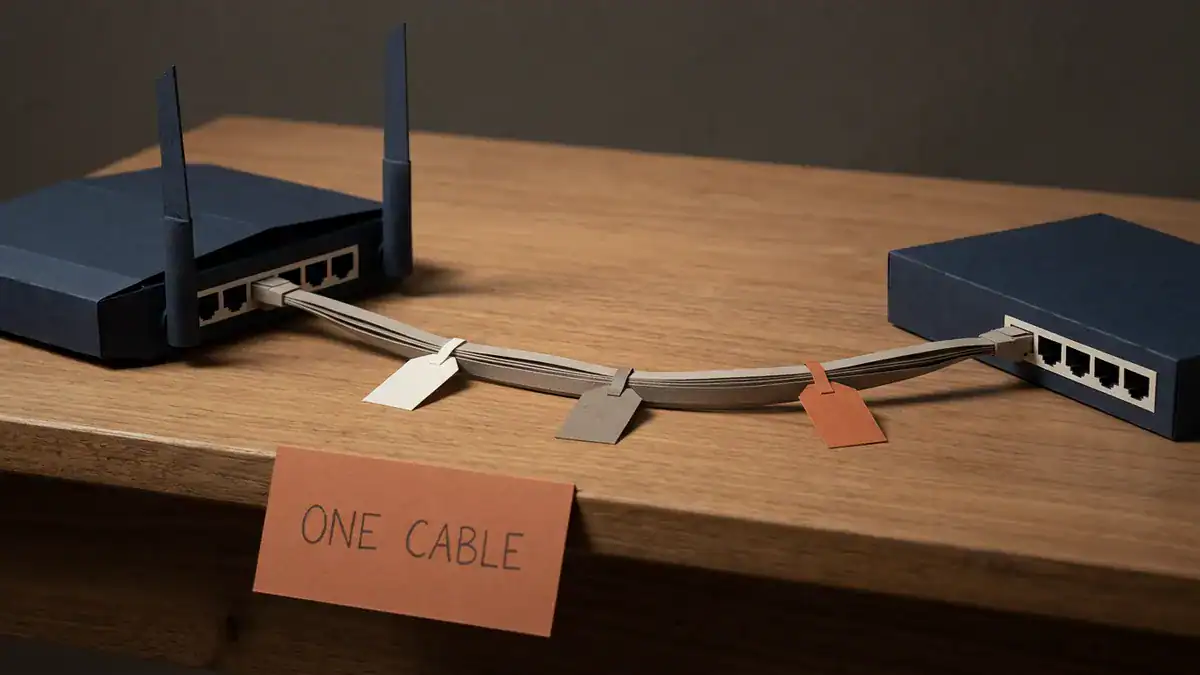
One cable, one port at each end, three VLANs riding it. Every other port stays empty.
How inter-VLAN routing works across one link
Follow a single packet. A PC at 192.168.10.50 in VLAN 10 wants to reach a server at 192.168.20.100 in VLAN 20.
- The PC compares the destination against its own subnet mask. Different subnet. So it sends the frame to its default gateway, 192.168.10.1.
- The switch receives the frame on an access port in VLAN 10. It needs to forward it toward the router, and the router port is a trunk, so the switch adds an 802.1Q tag marking the frame as VLAN 10.
- The frame crosses the stick. The router reads the tag, hands the frame to subinterface .10, and strips the tag off.
- Now it’s a routing decision. The router checks its table, sees 192.168.20.0/24 is directly connected via subinterface .20, and rewrites the frame for that network.
- The frame goes back out the same physical port, this time tagged as VLAN 20.
- The switch strips the tag and delivers it to the server’s access port.
Notice what happened there. The packet crossed that one cable twice. Remember that. It comes back later as the reason router on a stick has a ceiling.

The switch adds the tag on the way in. The router reads it, strips it, and routes what is left.
Want to actually watch this happen? Our CCNA workbook ships with the topology pre-built, so you can boot it and trace the frame yourself instead of reading about it.
Router on a stick configuration, start to finish
Here’s a full working build. Three VLANs, one trunk, one router. Commands are Cisco IOS on an ISR with a Catalyst switch, which is what the CCNA lab uses.
The topology: VLAN 10 for staff, VLAN 20 for servers, VLAN 99 as the native VLAN. Router connects to the switch on Gi0/1.
Step 1: Build the VLANs on the switch
Switch(config)# vlan 10
Switch(config-vlan)# name STAFF
Switch(config-vlan)# vlan 20
Switch(config-vlan)# name SERVERS
Switch(config-vlan)# vlan 99
Switch(config-vlan)# name NATIVE
Switch(config-vlan)# exit
Then drop your access ports into the right VLANs.
Switch(config)# interface range gi0/2 - 12
Switch(config-if-range)# switchport mode access
Switch(config-if-range)# switchport access vlan 10
A VLAN that isn’t created won’t carry traffic no matter what the router says. Check with show vlan brief before you go further.
Step 2: Turn the uplink into an 802.1Q trunk
This is the port facing the router.
Switch(config)# interface gi0/1
Switch(config-if)# switchport trunk encapsulation dot1q
Switch(config-if)# switchport mode trunk
Switch(config-if)# switchport trunk native vlan 99
Switch(config-if)# switchport trunk allowed vlan 10,20,99
Two notes. The switchport trunk encapsulation dot1q line only exists on older switches that also supported ISL, and newer ones reject it because dot1q is all they do. If IOS refuses the command, skip it.
The allowed vlan line is optional but you should use it. Leave it off and the trunk carries every VLAN on the switch, including ones you never meant to route. Set it explicitly and you’ve documented your own design.
Step 3: Carve the router into subinterfaces
Bring the physical interface up first. It gets no IP address of its own.
Router(config)# interface gi0/0/0
Router(config-if)# no shutdown
Router(config-if)# exit
Now the subinterfaces.
Router(config)# interface gi0/0/0.10
Router(config-subif)# description STAFF gateway
Router(config-subif)# encapsulation dot1Q 10
Router(config-subif)# ip address 192.168.10.1 255.255.255.0
Router(config-subif)# exit

Router(config)# interface gi0/0/0.20
Router(config-subif)# description SERVERS gateway
Router(config-subif)# encapsulation dot1Q 20
Router(config-subif)# ip address 192.168.20.1 255.255.255.0
Router(config-subif)# exit
The subinterface number and the VLAN ID don’t have to match. gi0/0/0.10 could be gi0/0/0.437 and it’d still work, because the subinterface number is locally significant and means nothing to the switch. The encapsulation dot1Q 10 line is what does the actual mapping.
So why does everyone number them to match? Because six months from now you’ll be reading this config at 2am, and matching numbers means you won’t have to think.

One physical port, three subinterfaces. The encapsulation line is what maps each flap to a VLAN.
Pick your addressing before you type any of this. If the gateway sits in the wrong subnet, every ping fails and the config looks perfect. Our subnetting guide and the private IP ranges reference will keep you out of that hole.
Step 4: The native VLAN line everyone forgets
Untagged frames arrive on the trunk too. Control traffic, some management protocols, anything the switch sends without a tag. Those frames belong to the native VLAN, and they need a subinterface willing to accept them.
Router(config)# interface gi0/0/0.99
Router(config-subif)# description NATIVE
Router(config-subif)# encapsulation dot1Q 99 native
Router(config-subif)# ip address 192.168.99.1 255.255.255.0
That trailing native keyword is the whole point. Cisco’s own guidance is direct about it: use the native keyword when the VLAN ID is the native VLAN of the 802.1Q trunk, and don’t configure encapsulation on the native VLAN without it (Cisco, Configuring Layer 3 Subinterfaces).
Only one subinterface per physical port can carry it. And the VLAN number here has to match switchport trunk native vlan on the switch side, or you get a mismatch that partially works, which is worse than something that fails outright.

Everything else arrives tagged. One thing does not, and it still needs somewhere to land.
Leaving VLAN 1 as your native VLAN is the lazy default. Don’t. Move it to an unused VLAN like 99, on both ends.
I’ve watched this one line cost people an entire evening. Everything pings, the tagged VLANs route fine, and then one management tool can’t reach anything and nobody knows why.
Step 5: Point the hosts at their gateways
Every host in VLAN 10 needs 192.168.10.1 as its default gateway. Every host in VLAN 20 needs 192.168.20.1. Get this wrong and the router config is irrelevant.
If DHCP is handing out addresses, the pool for each VLAN has to advertise the matching subinterface address. Easy to miss when you clone a pool.
How to verify router on a stick is working
Configs that look right and networks that work are different things. Check both sides.
On the router:
Router# show ip interface briefEvery subinterface should read up / up. The physical interface should read up / up too, with no IP address. If the physical is down, everything under it is down.
Router# show ip routeYou want a directly connected route for each VLAN subnet, each pointing at its own subinterface. No route, no routing.
Router# show vlansThis one’s underused. It lists each dot1Q subinterface, its VLAN ID, which one is native, and packet counters per VLAN. If a VLAN’s counters sit at zero while traffic is supposedly flowing, the frames aren’t reaching the router.
On the switch:
Switch# show interfaces trunkRead three things: that the port is actually trunking, which native VLAN it reports, and which VLANs are allowed and active. This single command catches most router on a stick failures.
Switch# show vlan briefConfirms the VLANs exist and shows which ports are assigned where.
Then test it properly. Ping the local gateway first. If that fails, the problem is between the host and the router, not in your routing. Only after the gateway answers should you ping across VLANs.
Router on a stick troubleshooting: five failures you’ll hit
Nobody’s tutorial covers this part, and it’s where the time actually goes.
| Symptom | Likely cause | Fix |
|---|---|---|
| All subinterfaces down/down | Physical interface still shut | no shutdown on the physical interface, not the subinterfaces |
| Only one VLAN reaches the router | Switch port negotiated access mode, not trunk | switchport mode trunk, confirm with show interfaces trunk |
| Most VLANs work, one doesn’t | That VLAN got pruned off the trunk | Add it to switchport trunk allowed vlan |
| Odd partial failures, CDP logs a mismatch | Native VLAN differs on the two ends | Match switchport trunk native vlan to the subinterface with native |
| Gateway pings, other VLANs don’t | Host default gateway or mask is wrong | Fix the host, not the router |
A few extra ones worth knowing.
The VLAN exists on the trunk but not on the switch. Allowing VLAN 30 on a trunk doesn’t create VLAN 30. show vlan brief tells you in two seconds.
Two subinterfaces tagged with the same VLAN ID. IOS will usually complain, but on some versions the second one silently wins and you chase a ghost.
A blocked path. If your topology has redundant links, spanning tree may be blocking the one you assume traffic takes. How spanning tree picks its path explains what it’s doing before you blame the router.
Work it in order: physical, trunk, tag, IP, host. Each layer depends on the one under it, and checking them out of order is how an hour disappears.
Router on a stick vs SVI vs Layer 3 switch
This is the real decision, and it’s the question the search results dodge.
An SVI is a switched virtual interface, a logical layer 3 interface for a VLAN configured on the switch itself. On a Layer 3 switch, SVIs do inter-VLAN routing in hardware, no router involved.
Switch(config)# ip routing
Switch(config)# interface vlan 10
Switch(config-if)# ip address 192.168.10.1 255.255.255.0
Switch(config-if)# no shutdown
That ip routing line matters. Leave it off and your SVIs come up and route nothing.
One quirk of SVI on Cisco: the interface stays down until the VLAN exists and at least one active port carries it, whether that’s an access port with a live device or a trunk. A brand new SVI showing down/down usually isn’t broken, it’s just lonely.
| Router on a stick | SVI on Layer 3 switch | One router port per VLAN | |
|---|---|---|---|
| Where routing happens | Router, often in software | Switch ASIC, in hardware | Router |
| Ports consumed | 1 trunk | 0 extra | 1 per VLAN |
| Throughput | Shared, halved by the hairpin | Line rate | Line rate per VLAN |
| Cost | Reuses hardware you own | Needs a Layer 3 switch | Burns router ports fast |
| Scales to | A handful of VLANs | Hundreds | However many ports you have |
| Typical home | Branch office, lab, exam | Campus and distribution | Legacy, rare now |
The rule: if you have a Layer 3 switch, use SVIs. If you don’t, use router on a stick. If you’re running more than a few VLANs with real traffic between them, buy the Layer 3 switch.
Separate physical interfaces per VLAN is the third option and almost nobody picks it, because router ports are expensive and you run out at four.
The disadvantage nobody puts a number on
Every article says router on a stick creates a bottleneck. None of them do the math.
Go back to the packet walk. Traffic from VLAN 10 to VLAN 20 crosses the trunk twice, in and then back out the same interface. So a 1 Gbps trunk gives you roughly 500 Mbps of usable VLAN-to-VLAN throughput at absolute best, before you count overhead or contention from any other VLAN pair sharing the same wire.
Three VLANs all talking to a server VLAN? They’re all queuing for the same 1 Gbps.

Up the stick and back down it. That is why a 1 Gbps trunk gives you about 500 Mbps between VLANs.
Then there’s the router itself. Entry-level branch routers forward far less than line rate once features stack up, and a Layer 3 switch doing the same job in its ASIC won’t break a sweat.
And it’s a single point of failure. That one cable, that one port, that one router. Anything goes and every VLAN loses reachability to every other VLAN at once. Traffic inside each VLAN keeps flowing, which makes the failure look stranger than it is when the tickets start coming in.
None of this makes router on a stick wrong. It makes it a design with a known ceiling, and knowing where the ceiling sits is the difference between choosing it and defaulting to it.
When router on a stick is still the right call
Plenty of places.
A branch office with a handful of VLANs. Twenty users, three VLANs, most traffic heading to the WAN anyway. A Layer 3 switch would sit there being expensive.
Any lab. It’s the cleanest way to see tagging, subinterfaces and routing interact, which is exactly why it’s on the exam.
Existing hardware. You’ve got a router and a layer 2 switch and no budget this quarter. Router on a stick works today.
Where the router is already doing the work. If everything between VLANs has to pass a firewall or NAT policy on that router regardless, forcing traffic through it isn’t a bottleneck, it’s the design. Worth reading how NAT handles that translation if that’s your setup.
Where it stops making sense: heavy server-to-server traffic, VoIP at scale, anything where a few hundred milliseconds of added latency shows up in a complaint.
Build it yourself
Reading a config isn’t the same as watching a tagged frame hit a subinterface. Build this one.
Packet Tracer handles it fine and it’s free, which makes it the right starting point. EVE-NG runs real IOS images, so show vlans returns what a production router returns rather than a simulation of it. Our comparison of Packet Tracer and EVE-NG covers when the upgrade is worth the effort, and the EVE-NG CCNA lab list has this topology in it.
Build it, then break it on purpose. Shut the physical interface. Set the native VLAN wrong on one side. Prune a VLAN off the trunk. Watch what each failure looks like from the CLI, because that’s the muscle memory the exam and the job both want.
Worth knowing: Cisco announced the CCNA 200-301 v2.0 blueprint on 2026-05-20, with testing starting 2027-02-03, and inter-VLAN routing carries forward (Cisco Learning Network). The blueprint also leans harder on troubleshooting, which makes the breaking-it-on-purpose habit worth more than it used to be.
Studying for the exam? The SMEnode Labs CCNA workbook ships the lab environment along with the theory, so the topology boots instead of sitting in a diagram.
Frequently asked questions
What does inter-VLAN routing mean?
Moving traffic between VLANs. VLANs are separate broadcast domains and can’t reach each other on their own, so a layer 3 device has to route between them. Router on a stick and SVIs are the two common ways to do it.
Can a router on a stick perform inter-VLAN routing?
Yes. That’s its only job. One physical interface, split into tagged subinterfaces, routing between every VLAN on the trunk.
How do I configure a Cisco router on a stick?
Create the VLANs on the switch, set the uplink to trunk mode, create one router subinterface per VLAN with encapsulation dot1Q <vlan-id> and an IP address, add native to the subinterface matching the trunk’s native VLAN, and point each host at its gateway. Full commands are in the configuration section above.
What is the difference between router on a stick and an SVI?
Router on a stick routes on an external router across a trunk link. An SVI routes on a Layer 3 switch, in hardware, with no external router and no shared link. SVIs are faster and scale further. Router on a stick is cheaper when you already own a layer 2 switch and a router.
Can you put a VLAN on a router?
Not the way you put one on a switch. A router doesn’t hold VLAN membership, it terminates VLANs. A subinterface tagged with encapsulation dot1Q 10 acts as VLAN 10’s gateway without the router being a member of it.
What is L2 VLAN and L3 VLAN?
An L2 VLAN is the broadcast domain itself, defined on the switch. An L3 VLAN is that VLAN once it has a routed interface, an SVI or a router subinterface, giving it a gateway address and a path off the VLAN.
What is the disadvantage of using router on a stick?
Two. All inter-VLAN traffic shares one physical link and crosses it twice, so a 1 Gbps trunk yields around 500 Mbps of usable throughput between VLANs. And that link is a single point of failure for every VLAN at once.
Does the subinterface number have to match the VLAN ID?
No. The subinterface number is locally significant. The encapsulation dot1Q command does the mapping. Match them anyway, for the sake of whoever reads the config next.
Key takeaways
- Router on a stick routes between VLANs over one physical interface using 802.1Q tagged subinterfaces.
- The switch port facing the router must be a trunk. Access mode is the most common failure.
- One subinterface needs
encapsulation dot1Q <vlan> native, matching the trunk’s native VLAN on the switch. - Verify with
show ip interface brief,show vlansandshow interfaces trunkbefore you start pinging. - Inter-VLAN traffic crosses the stick twice, so usable throughput is about half the link speed.
- Got a Layer 3 switch? Use SVIs instead. Router on a stick is for when you don’t.
Build it in a lab tonight. Break it three ways. That’s the fastest hour you’ll spend on this topic.