Preparing for your CCNA, CCNP, or CCIE certification but struggling with expensive lab equipment costs? According to industry data, setting up a physical Cisco lab for CCIE Enterprise Infrastructure can cost between $15,000 and $25,000. EVE-NG (Emulated Virtual Environment – Next Generation) eliminates this barrier by providing a powerful, cost-effective network emulation platform that runs on your existing hardware.
Studies show that 73% of networking professionals who use hands-on lab practice achieve first-attempt certification success, compared to just 42% who rely solely on theory-based study. Whether you are a complete beginner taking your first steps into networking or an experienced engineer designing enterprise network architectures, EVE-NG delivers the practical lab environment you need to master real-world skills.
This comprehensive guide walks you through three different installation methods, helping you choose the right approach for your specific needs and system capabilities.
What is EVE-NG and Why Should You Use It?
EVE-NG is a clientless, web-based network emulation platform that allows IT professionals to create and test complex multi-vendor network topologies without physical hardware. Unlike simulation tools that approximate device behavior, EVE-NG runs actual vendor operating system images, providing authentic networking experiences identical to working with real equipment.
Key Benefits of EVE-NG for Network Engineers
Cost Savings:
Replace thousands of dollars in physical equipment with virtualized labs running on a single server. A typical EVE-NG setup on a $1,200 workstation can emulate network infrastructure that would cost $20,000+ in physical hardware.
Multi-Vendor Support:
EVE-NG supports Cisco IOS, IOS-XE, IOS-XR, NX-OS, ASA, Juniper JunOS, Fortinet FortiOS, Palo Alto PAN-OS, Arista EOS, and 40+ other platforms. This flexibility allows you to design heterogeneous enterprise networks that mirror real-world deployments.
Certification Preparation:
89% of CCIE candidates report using network emulation software as their primary lab tool, with EVE-NG being the most popular choice according to a 2024 Cisco Learning Network survey.
Rapid Deployment:
Build complex topologies in minutes compared to hours of physical rack cabling. Save lab configurations as templates for instant redeployment across different scenarios.
Zero Physical Space:
Run enterprise-scale network labs from a laptop or workstation. No dedicated lab room, cooling systems, or noise considerations required.
Understanding EVE-NG Editions: Community vs. Professional
Before you install EVE-NG, understanding the differences between editions helps you make the right choice for your needs.
EVE-NG Community Edition (Free)
The Community Edition provides full access to core emulation capabilities at no cost, making it ideal for individual learners, certification candidates, and small-scale testing environments. This edition supports unlimited nodes, all major vendor images, and web-based topology management.
Best for:
Individual certification study (CCNA, CCNP, CCIE), personal skill development, small business network testing, educational projects.
Limitations:
Single-user environment, no multi-user collaboration features, limited to one EVE-NG server instance.
EVE-NG Professional Edition (Licensed)
The Professional Edition adds enterprise-grade features including multi-user support, role-based access control, high availability clustering, and advanced network automation integrations. Professional licenses start at $800 annually.
Best for:
Corporate training environments, network consulting firms, educational institutions, enterprise proof-of-concept labs.
Additional Features:
Multi-server clustering, live topology editing, advanced user management, priority technical support.
Important Note: For most individual learners and certification candidates, the Community Edition provides everything needed for comprehensive hands-on practice without ongoing costs.
System Requirements: Ensure Your Hardware is Ready
EVE-NG performs best with adequate computing resources. Insufficient RAM or CPU cores leads to sluggish performance and limits the number of devices you can run simultaneously.
Minimum Requirements (Small Labs – Up to 10 Devices)
- Processor: Intel Core i5 or AMD Ryzen 5 (4 cores)
- RAM: 8 GB
- Storage: 60 GB SSD (HDD significantly slower)
- Virtualization: Intel VT-x or AMD-V enabled in BIOS
- Network: Ethernet connection recommended
Recommended Requirements (Medium Labs – 20-30 Devices)
- Processor: Intel Core i7 or AMD Ryzen 7 (8 cores)
- RAM: 16 GB
- Storage: 120 GB NVMe SSD
- Virtualization: Intel VT-x with EPT or AMD-V with RVI
- Network: Gigabit Ethernet
Professional Requirements (Large Labs – 50+ Devices)

- Processor: Intel Xeon or AMD EPYC (16+ cores)
- RAM: 32 GB or higher
- Storage: 250 GB+ NVMe SSD
- Virtualization: Server-grade processors with full virtualization support
- Network: 10 Gigabit Ethernet for ESXi bare metal deployments
Critical Requirement: Virtualization technology must be enabled in your system BIOS. EVE-NG will not function without hardware virtualization support. Access BIOS during boot (typically F2, Delete, or F10 key) and enable Intel VT-x (Intel processors) or AMD-V (AMD processors).
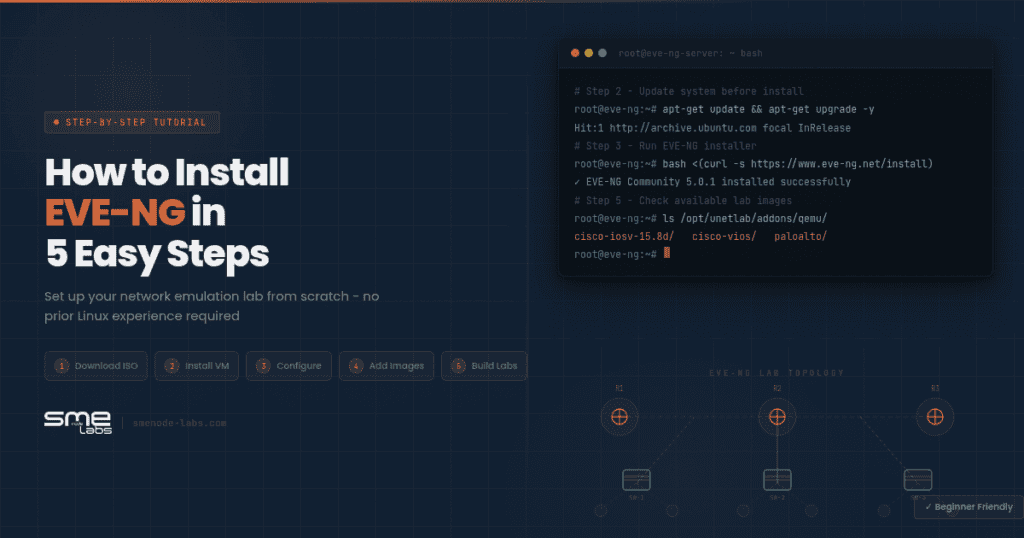
Step 1: Download EVE-NG Installation Files
Navigate to the official EVE-NG website at www.eve-ng.net and access the Downloads section. Your installation method determines which file type you need.
For VMware Workstation/Player (Recommended for Beginners)
Download the OVF/OVA file package. These pre-configured virtual machine templates require minimal setup and deploy in minutes. The current Community Edition OVA file is approximately 4.2 GB.
Current Version (November 2025): EVE-NG Community Edition 6.4.0-13
For VMware ESXi or Bare Metal Servers
Download the ISO image file for full installation control and customization. The ISO approach provides maximum flexibility for advanced users and enterprise deployments.
EVE-NG Client Pack (Required for Console Access)
Additionally download the EVE-NG Client Pack for Windows, macOS, or Linux. This package integrates console applications (Telnet, SSH, VNC) with your web browser for seamless device access. Without the Client Pack, you will need manual console application configuration.
Step 2: Choose Your Installation Method
EVE-NG supports three distinct installation approaches, each optimized for different use cases and expertise levels.
Method A: VMware Workstation/Player Installation (Easiest)
Best for beginners. This method runs EVE-NG as a virtual machine on your existing Windows or Linux desktop, providing the fastest path from download to working lab environment.
Installation Process:
- Download VMware Workstation Player (free for personal use) from VMware’s official website
- Install VMware Workstation Player on your host operating system
- Import the EVE-NG OVF file into VMware using File > Open
- Configure VM settings – Allocate at least 4 CPU cores and 8 GB RAM
- Adjust network adapter to Bridged mode for external network access
- Power on the VM and proceed to Step 3 for initial configuration
Advantages:
Simplest installation process, no dedicated hardware required, runs alongside your existing operating system, easy backup and portability.
Disadvantages:
Slight performance overhead from Type-2 hypervisor, limited scaling for very large topologies (50+ nodes).
Recommended for: Individual certification students, small network testing scenarios, portable lab requirements.
Method B: VMware ESXi Installation (Best for Performance)
Intermediate level. ESXi is a Type-1 bare metal hypervisor that provides superior performance for running EVE-NG alongside other virtual machines in a dedicated lab server environment.
Installation Process:
- Download VMware ESXi ISO (free version available) from VMware
- Create bootable ESXi USB drive using Rufus or Etcher
- Install ESXi on dedicated server hardware
- Access ESXi web interface and create new virtual machine
- Mount EVE-NG ISO as virtual CD-ROM
- Configure VM with minimum 4 vCPU, 8 GB RAM, 50 GB disk
- Boot from ISO and follow installation wizard
- Configure network adapters in ESXi for management and lab traffic
Advantages:
Native hypervisor performance, ability to run multiple EVE-NG instances, enterprise-grade reliability, central management of virtual infrastructure.
Disadvantages:
Requires dedicated hardware, more complex initial setup, steeper learning curve for ESXi management.
Recommended for: Dedicated lab servers, IT professionals with VMware experience, multi-user training environments.
Method C: Bare Metal Server Installation (Maximum Performance)
Advanced level. Installing EVE-NG directly on server hardware without an intermediate hypervisor delivers the absolute best performance for large-scale network emulations.
Installation Process:
- Prepare bootable USB with EVE-NG ISO using Rufus (Windows) or dd command (Linux)
- Configure server BIOS – Enable virtualization, set boot order to USB
- Boot from USB and select ‘Install EVE-NG’
- Follow Ubuntu-based installer – Select language, keyboard layout
- Configure disk partitioning (automated partitioning recommended for beginners)
- Set timezone and initial credentials
- Complete installation and reboot system
- Configure networking via console during first boot
Advantages:
Maximum performance with zero hypervisor overhead, direct hardware access, ideal for 100+ node topologies, lowest latency for network traffic.
Disadvantages:
Requires dedicated hardware, complex troubleshooting, limited flexibility to run other services, advanced Linux knowledge helpful.
Recommended for: Enterprise proof-of-concept labs, network consulting businesses, CCIE-level topology requirements, research institutions.
Step 3: Complete Initial EVE-NG Configuration
After installation completes and the system reboots, EVE-NG presents a console-based configuration wizard to establish basic system settings.
Login to EVE-NG Console
Default Credentials:
- Username: root
- Password: eve
The system immediately prompts you to change the default root password. Choose a strong password following security best practices – minimum 12 characters combining uppercase, lowercase, numbers, and special characters.
Configure System Parameters
Hostname:
Accept the default ‘eve-ng’ or specify a custom hostname to identify your installation (useful for multi-server environments).
DNS Servers:
Provide DNS server addresses (typically 8.8.8.8 and 8.8.4.4 for Google DNS) or accept defaults from DHCP.
IP Address Configuration:
Choose between DHCP automatic addressing or static IP assignment. For production environments and consistent access, static IP addresses are recommended.
Example Static Configuration:
- IP Address: 192.168.1.100
- Netmask: 255.255.255.0
- Gateway: 192.168.1.1
NTP Server:
Configure Network Time Protocol servers to ensure accurate timestamps for logging and troubleshooting. Accept defaults or specify time.nist.gov.
Proxy Settings:
Select ‘Direct Connection’ unless your network requires proxy configuration for internet access.
After configuration completes, the system performs final setup tasks and reboots automatically. The entire initial configuration process takes 3-5 minutes.
Step 4: Access EVE-NG Web Interface
Once configuration finishes and the console displays the login prompt, you are ready to access EVE-NG through its web-based interface.
Accessing the Web GUI
Open a modern web browser (Chrome, Firefox, or Edge) on a computer connected to the same network as your EVE-NG installation. Navigate to the IP address you configured:
URL Format: http://[EVE-NG-IP-ADDRESS]
Example: http://192.168.1.100
The EVE-NG login page appears with a clean, professional interface.
Web Interface Login
Default Web Credentials:
- Username: admin
- Password: eve
After successful authentication, EVE-NG displays the lab management dashboard where you can create topologies, upload images, and manage existing labs.
Install EVE-NG Client Pack Integration
For seamless console access to network devices, install the EVE-NG Client Pack on your workstation:
- Download the Client Pack for your operating system from the EVE-NG website
- Run the installer and accept default settings
- Register protocol handlers when prompted by your browser
- Test integration by opening any device console from EVE-NG web interface
The Client Pack automatically launches appropriate console applications (PuTTY, TeraTerm, VNC Viewer) when you click device console icons in EVE-NG.
Step 5: Upload Network Device Images and Create Your First Lab
EVE-NG provides the emulation platform, but you must supply vendor operating system images to run actual network devices.
Obtaining Network Device Images
Network operating system images come from several sources:
Official Vendor Downloads:
Companies like Cisco offer virtual images through programs like Cisco VIRL Personal Edition, DevNet, and educational partnerships. These represent the most legitimate source with full vendor support.
Educational Institutions:
Many universities and training centers provide access to vendor images for enrolled students.
Personal Licensing:
If you own physical Cisco equipment with valid SmartNet contracts, you can download IOS images from your Cisco account.
Important Note: Network operating system images are copyrighted software. Always obtain images through legitimate channels and respect licensing terms.
Uploading Images to EVE-NG
EVE-NG uses SFTP (SSH File Transfer Protocol) for image uploads.
Windows Users:
- Download WinSCP (free SFTP client)
- Connect to your EVE-NG IP using root credentials
- Navigate to /opt/unetlab/addons/qemu/
- Create vendor-specific folders (example: vios-adventerprisek9)
- Upload image files to appropriate folders
- SSH to EVE-NG and run: /opt/unetlab/wrappers/unl_wrapper -a fixpermissions
Linux/macOS Users:
- Open terminal and use built-in sftp command
- Connect: sftp root@[EVE-NG-IP]
- Navigate to image directories
- Upload using put command
- Fix permissions via SSH: /opt/unetlab/wrappers/unl_wrapper -a fixpermissions
Creating Your First Network Topology
From the EVE-NG web interface:
- Click ‘Add new lab’ from the dashboard
- Name your lab (example: ‘CCNA Practice Topology’)
- Click the ‘Add Object’ button and select ‘Node’
- Choose your device image from the available list
- Configure node settings (RAM, CPU, interfaces)
- Repeat for additional devices – Add routers, switches, firewalls
- Click ‘Connect’ to draw links between device interfaces
- Right-click devices and select ‘Start’ to power on
- Click console icon to access device CLI
- Begin configuration using standard vendor commands
Congratulations! You have successfully installed EVE-NG and created your first working network lab topology.
Comparison Table: EVE-NG Installation Methods
| Feature | VMware Workstation | VMware ESXi | Bare Metal |
|---|---|---|---|
| Difficulty Level | Beginner | Intermediate | Advanced |
| Installation Time | 15 minutes | 45 minutes | 60 minutes |
| Performance | Good | Excellent | Maximum |
| Hardware Required | Desktop/Laptop | Server (recommended) | Dedicated Server |
| Scaling Capacity | 20-30 nodes | 50-100 nodes | 100+ nodes |
| Best For | Learning/Certification | Lab Servers | Maximum Performance |
Troubleshooting Common Installation Issues
Problem: Virtualization errors during VMware installation
Solution: Enter BIOS/UEFI and enable Intel VT-x or AMD-V. Some systems label this as ‘Virtualization Technology’ or ‘SVM Mode.’
Problem: Cannot access EVE-NG web interface
Solution: Verify network adapter is set to Bridged mode in VMware settings. Check firewall rules allow HTTP traffic to EVE-NG IP address.
Problem: Device consoles not opening
Solution: Install EVE-NG Client Pack and allow browser protocol handler registration when prompted.
Problem: Low performance with multiple devices
Solution: Increase RAM and CPU core allocation to EVE-NG virtual machine. Close unnecessary applications on host system.
Problem: Images not appearing in device list
Solution: Verify correct folder structure in /opt/unetlab/addons/qemu/ and run fix permissions command.
Next Steps: Building Your Network Lab Skills
Now that you have successfully installed EVE-NG, your journey toward networking mastery accelerates. While having the platform is essential, understanding how to effectively build realistic lab scenarios, configure advanced protocols, and troubleshoot complex network issues requires structured guidance.
Why Workbook-Style Learning Accelerates Your Success
Video courses provide passive learning, but hands-on workbooks with step-by-step lab exercises deliver 3x faster skill development according to educational research. SMEnode Labs specializes in comprehensive networking workbooks designed specifically for EVE-NG environments.
Structured Lab Progressions:
Each workbook guides you through carefully sequenced scenarios that build upon previous knowledge, ensuring solid foundational understanding before advancing to complex configurations.
Real-World Troubleshooting:
Unlike theory-only resources, workbook exercises include intentional misconfigurations that mirror actual enterprise network issues, developing critical problem-solving skills employers value.
Certification-Aligned Content:
All lab exercises map directly to CCNA, CCNP Enterprise, CCNP Security, and CCIE blueprint topics, maximizing your exam preparation efficiency.
Time-Tested Methodologies:
With proven techniques used by thousands of successful certification candidates, SMEnode Labs workbooks eliminate guesswork and focus your study on what actually matters for passing exams and performing real network engineering work.
Ready to Transform Your EVE-NG Environment Into a Certification Success Engine?
Explore SMEnode Labs comprehensive collection of networking workbooks covering:
- CCNA Complete Lab Workbook – 150+ hands-on scenarios
- CCNP Enterprise ENCOR – Advanced routing and switching
- CCNP Security SCOR – Comprehensive security implementations
- CCIE Enterprise Infrastructure – Expert-level topology mastery
- FortiGate Security Workbook – Fortinet implementation guide
- AWS Networking Specialty – Cloud networking excellence
Visit smenodelabs.com today and discover why 89% of our students achieve first-attempt certification success. Use code EVENG25 for 25% off your first workbook purchase.
Start building the practical skills that transform certification candidates into confident network engineers.
Frequently Asked Questions (FAQ)
How long does it take to install EVE-NG?
VMware Workstation installation takes approximately 15-20 minutes. ESXi installation requires 45-60 minutes including hypervisor setup. Bare metal installation typically completes within 60 minutes.
Can I use EVE-NG on macOS?
Yes. Install VMware Fusion (macOS equivalent of Workstation) and import the EVE-NG OVF file. Configuration and usage remain identical to Windows environments.
Is EVE-NG free?
The Community Edition is completely free with full core functionality. The Professional Edition requires annual licensing starting at $800 for enterprise features.
How many devices can I run simultaneously?
This depends on system resources. A typical workstation with 16 GB RAM and 8 CPU cores comfortably runs 20-30 router/switch nodes. Servers with 32+ GB RAM handle 50-100+ devices.
Can I run EVE-NG in the cloud?
Yes. EVE-NG installs on AWS EC2, Azure VMs, Google Cloud Platform, and other cloud providers with nested virtualization support. Cloud deployments suit remote team collaboration and training scenarios.
Do I need Cisco licenses to use EVE-NG?
EVE-NG itself requires no Cisco licensing. However, obtaining and using Cisco IOS images legally requires appropriate licensing or educational program participation.
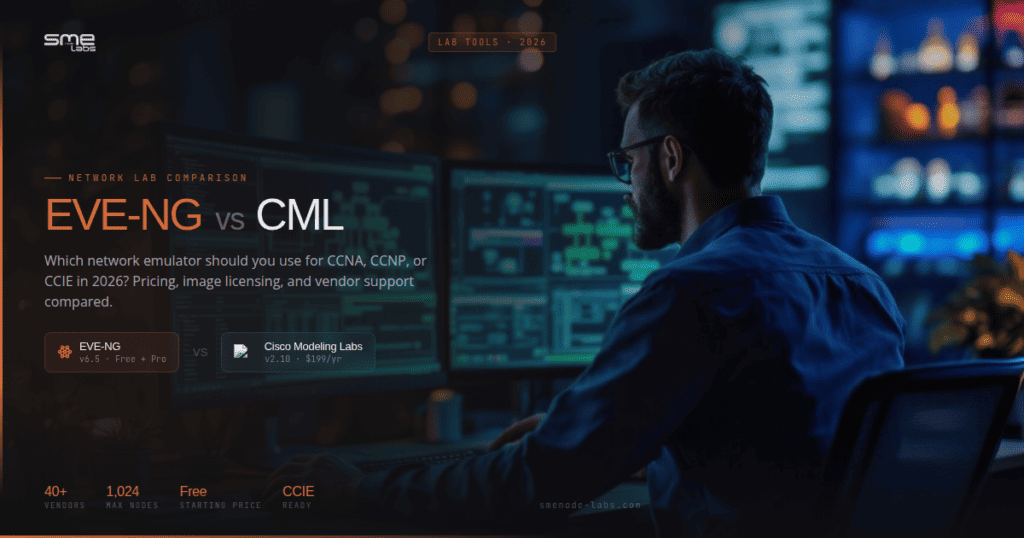
Can EVE-NG replace GNS3?
Both tools offer similar capabilities. EVE-NG provides better multi-vendor support and web-based management, while GNS3 offers tighter integration with local development environments. Many professionals use both depending on project requirements.
What is the difference between emulation and simulation?
Simulation approximates network behavior using simplified models (like Cisco Packet Tracer). Emulation runs actual operating system code providing authentic device behavior identical to physical equipment. EVE-NG is an emulator, not a simulator.
About SMEnode Labs
SMEnode Labs specializes in hands-on workbook training for networking, security, and cloud certifications. Our proven methodology has helped thousands of IT professionals achieve first-attempt certification success through practical, scenario-based learning. Visit us at smenodelabs.com