FortiGate high availability (HA) joins two identical FortiGates into one cluster with the FortiGate Clustering Protocol (FGCP). One unit forwards traffic and the other waits, so a firewall failure doesn’t take the network down. This free FortiGate HA setup and troubleshooting PDF gives you the CLI to build an active-passive pair, the five commands to run first when it misbehaves, and 12 worked faults, from split brain to configs that won’t sync.

What is HA in a FortiGate firewall?
FortiGate HA lets a cluster keep providing FortiGate services when one unit fails. Fortinet’s own words for FGCP are failover protection: the cluster carries on even when one device hits a problem that would take a standalone FortiGate offline.
In the active-passive design this PDF uses, one member is the primary and forwards all traffic. The other is the secondary and stays on standby. Both share the same WAN and LAN addresses, and after a failover the new primary takes over the same virtual MAC addresses, so neighbouring gear treats it as the same device.
The members must match. Fortinet’s HA formation guide lists the same model and the same hardware configuration as the starting point.
HA behaviour here follows Fortinet’s FortiOS 7.6 documentation (reviewed 2026-10-12). Syntax can differ between builds, so check it with ? on yours.
One limit to remember. HA protects against a firewall failure. The ISP, the WAN switch, the LAN switch and shared power are still single points of failure. Don’t describe it as complete end-to-end availability.
FortiGate HA setup: how to configure HA in a FortiGate firewall (CLI)
The PDF builds one small-office FortiGate HA configuration. FGT-A starts as primary and FGT-B is the secondary. Both connect to a shared WAN switch (port1) and a shared LAN switch (port2). Two direct cables link port3 and port4 as heartbeat, and port5 is kept for management.
| Port | Role | FGT-A | FGT-B |
|---|---|---|---|
| port1 | WAN | 203.0.113.2/29 (shared) | 203.0.113.2/29 (shared) |
| port2 | LAN | 10.10.10.1/24 (shared) | 10.10.10.1/24 (shared) |
| port3 and port4 | Heartbeat HB1 and HB2 | Direct cables | Direct cables |
| port5 | Reserved management | 10.10.99.11/24 | 10.10.99.12/24 |
The addresses are documentation examples. Configure FGT-A first, through the console:
config system global
    set hostname "SME-FGT-A"
end
config system ha
    set mode a-p
    set group-id 10
    set group-name "SME-HA"
    set password "<same-strong-HA-secret>"
    set hbdev "port3" 100 "port4" 50
    set priority 200
    set override disable
    set monitor "port1" "port2"
    set session-pickup enable
    set session-pickup-connectionless enable
end
Use the same block on FGT-B, with the hostname SME-FGT-B and priority 100. Replace every <placeholder>. Don’t paste angle brackets literally.
| Setting | What it does |
|---|---|
mode a-p | Active-passive operation |
group-id, group-name, password | The shared cluster identity. Pick a group ID that doesn’t clash with other clusters nearby |
hbdev | The dedicated heartbeat ports. The 100 and 50 are heartbeat interface priorities, not election priorities |
priority | A per-unit election factor, different on A and B |
override disable | Stops priority-driven takeover after recovery. It doesn’t promise a permanent primary |
monitor | Watches the listed physical links, not application or internet reachability |
session-pickup | Copies supported session state to the peer. The connectionless option adds UDP and ICMP |
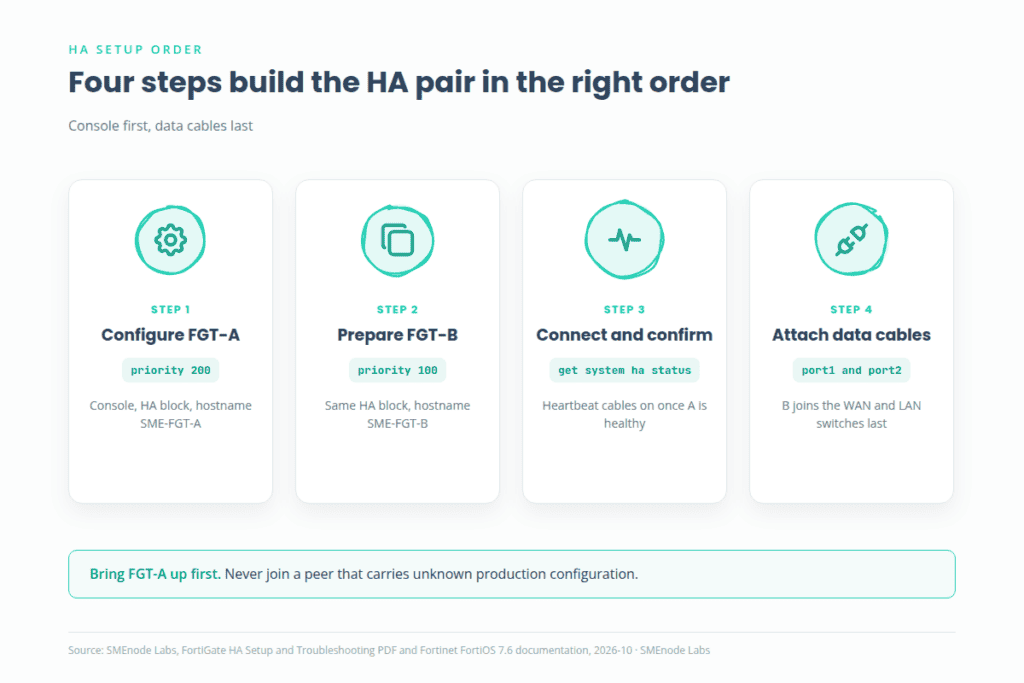
The order matters. Bring FGT-A up first. Connect the two heartbeat cables once A is healthy. Then confirm membership before you attach B’s data cables:
get system ha status
diagnose sys ha checksum cluster
execute ha manage ?
Check both serial numbers, the intended roles, two visible members and an in-sync config. Back up the config. Only then connect B’s port1 and port2, watch the event log and test traffic. Never join a peer that carries unknown production configuration.
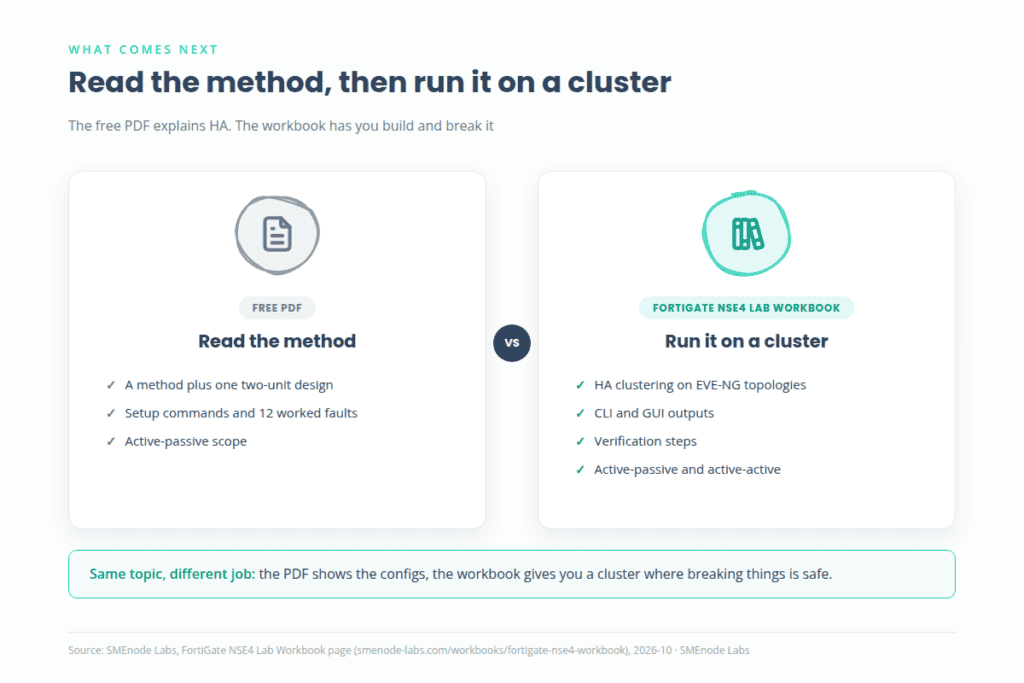
Want to build this pair yourself instead of reading it? The FortiGate NSE4 Lab Workbook covers HA clustering on ready-made EVE-NG topologies, with CLI and GUI outputs. Fortinet’s active-passive setup guide shows the GUI route.
FortiGate HA priority and override: who becomes primary?
Priority runs from 0 to 255 and defaults to 128. A higher number wins. Override is off by default, and when it’s on, priority beats uptime in the election. Fortinet’s primary unit selection criteria page says a new election runs when a unit joins or leaves and whenever a monitored interface changes state.
In the PDF, A gets 200 and B gets 100 with override disabled. That stops A from grabbing the primary role back the moment it recovers. It still doesn’t guarantee A stays primary. Priority alone doesn’t explain every election, so don’t assume the higher number always wins. Read the selection reason the device reports:
diagnose sys ha history read
How to access the secondary FortiGate firewall in HA (GUI and CLI)
You have two ways in, and the PDF sets up both.
The CLI, through the primary. List the members, then jump to the secondary:
execute ha manage ?
execute ha manage <index> <admin-user>
Use the index your device shows. Don’t assume it’s 1. Type exit to come back.
The GUI or SSH, through a reserved management interface. Reserve port5 and give each unit its own address:
config system ha
    set ha-mgmt-status enable
    config ha-mgmt-interfaces
        edit 1
            set interface "port5"
            set gateway 10.10.99.1
        next
    end
end
# On FGT-A only:
config system interface
    edit "port5"
        set ip 10.10.99.11 255.255.255.0
        set allowaccess ping https ssh
    next
end
# On FGT-B: repeat the interface block with 10.10.99.12
With https allowed, you open each unit’s GUI at its own management IP. Reserved management settings aren’t synchronized, so set them on both units. Fortinet describes this in its out-of-band management guide.
Can’t reach the secondary? Check the peer’s own IP, allowaccess, the gateway, the management VLAN and any trusted-host rules. Keep management on an isolated admin network and off the internet. Leave ha-direct off unless you’ve designed per-unit logging on purpose.
FortiGate HA troubleshooting: status commands for your first five minutes
Check FortiGate HA status first, and capture before you change anything:
get system status
get system ha status
show full-configuration system ha
diagnose sys ha history read
diagnose sys ha checksum cluster
Write down both serial numbers, the model, the firmware build, each unit’s role, the member count, the config status, the monitored links and the selection reason. Then compare the incident time with the event logs and recent changes. For a wider command list, see our FortiGate CLI commands cheat sheet and Fortinet’s CLI troubleshooting cheat sheet.
Then pick the branch that matches the symptom:
| Symptom | Start here |
|---|---|
| Only one member is visible | Formation, heartbeat and compatibility |
| Both members visible, status is out-of-sync | Configuration checksum comparison |
| The primary keeps changing | Election history, monitored links, resource health |
| New primary looks healthy, applications fail | Sessions, routes and upstream switching |
| Secondary management doesn’t answer | The per-member management path |
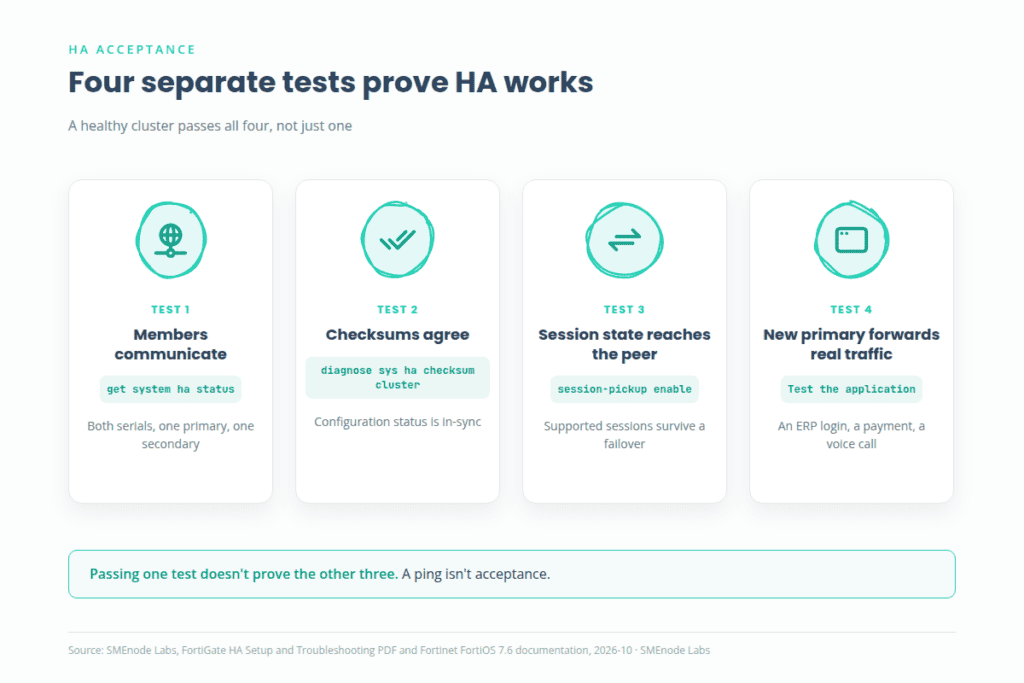
A healthy cluster passes four separate tests: the members can talk, the checksums agree, session state reaches the peer, and the new primary forwards your real application traffic. Passing one doesn’t prove the other three.
FortiGate HA out of sync: find the difference before you force a sync
Two members show up, but one says out-of-sync. Compare checksums from the top down:
diagnose sys ha checksum cluster
diagnose sys ha checksum show global
diagnose sys ha checksum show root
diagnose sys ha checksum show root firewall.policy
If global agrees, root differs and firewall.policy differs, you’ve found the table to inspect. Then compare the actual policy entries on both units. Replace root with the affected VDOM. Fortinet’s community has a good walkthrough of troubleshooting a checksum mismatch.
Back up both units first. Decide which config is the authoritative one, fix the specific cause, and let the sync settle. Recalculating checksums doesn’t repair different configs, so treat it as a later step:
diagnose sys ha checksum recalculate
Don’t reach for a forced sync (execute ha synchronize start) or a rebuild of the peer just to clear the label. And don’t treat every difference as a fault. Per-unit settings such as the reserved management interface differ by design.
After an interrupted upgrade, capture get system status on both members with the full build numbers and check the upgrade logs and the supported upgrade path. If sync still fails on matching builds, collect a short hasync debug for Fortinet support.
FortiGate split brain, repeated failover and HA members that won’t join
A replacement unit won’t join. Compare the model, the exact firmware build, HA mode, group settings, HA password and heartbeat ports. Check the cables and link counters on both ends. Keep the new unit’s data ports unplugged until its config and role are right.
Split brain. A switch outage hits both heartbeat paths and both units claim primary. Fortinet describes the result: two primaries using the same IP and virtual MAC, which causes address conflicts. A ping on a data port doesn’t prove the heartbeat works. Use the console on each unit, isolate the unit that shouldn’t forward, save both configs, restore the heartbeat and decide which config is authoritative before you reconnect.
Repeated failover or an unexpected failback. A monitored uplink may be flapping, or a recovered unit may have taken the primary role. Read the HA history and the selection reasons, then line them up with link, reboot and resource logs. Fix the flapping path. Don’t raise the heartbeat thresholds just to hide packet loss.
For a quick debug capture, always stop what you start:
diagnose debug reset
diagnose debug console timestamp enable
diagnose debug application hatalk -1
diagnose debug application hasync -1
diagnose debug enable
# Observe briefly, then always stop:
diagnose debug disable
diagnose debug reset
hatalk helps with HA communication and hasync with synchronization. Verbose output adds load and can expose configuration details, so clean up captures before you share them.
FortiGate HA troubleshooting: failover works, but applications don’t
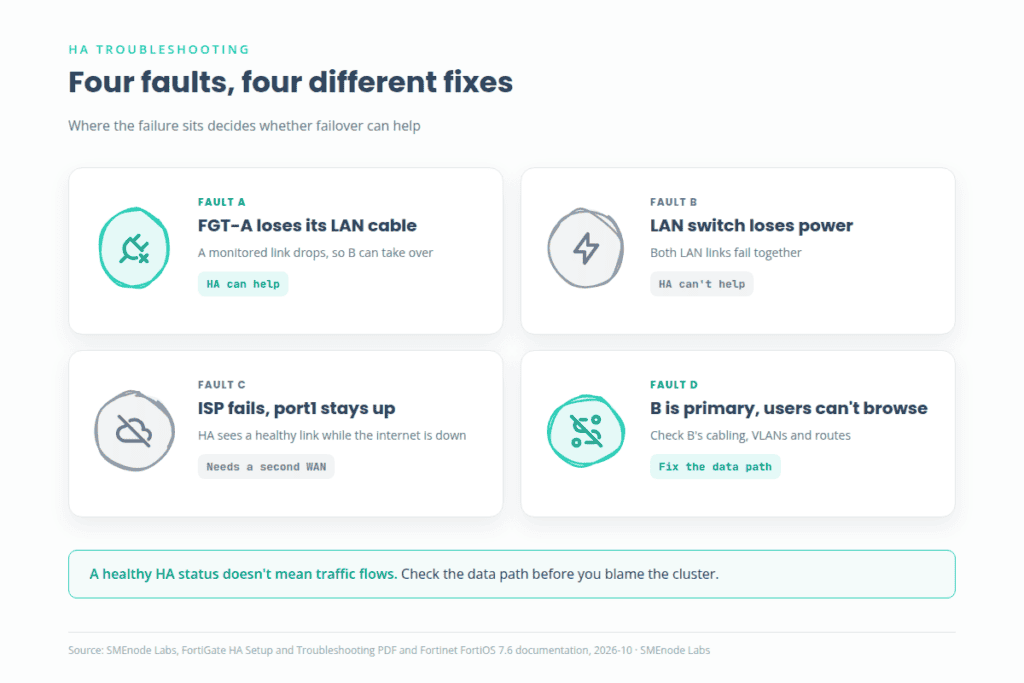
A role change is only part of recovery. Four faults on the reference network show how often the cluster is fine and the path isn’t:
| Fault | What happens | What to check |
|---|---|---|
| FGT-A loses its LAN cable | A’s port2 drops while B’s stays up | Both port2 states and HA history. A monitored link can trigger the takeover |
| LAN switch loses power | Both LAN links fail together | The switch and its power. A firewall role change can’t repair a shared failed switch |
| ISP fails but port1 stays up | The ISP router has link, the internet is down | The ISP next hop and a remote target. HA monitors the physical link, so use a second WAN with SD-WAN health checks |
| B becomes primary, users can’t browse | New HTTPS sessions fail | B’s port1 and port2 cabling, switch VLANs, routes, policy logs and upstream MAC learning |
Three more cases come up all the time:
- TCP survives, voice drops. Check
session-pickupandsession-pickup-connectionless, and remember that config sync and session sync are separate. Session pickup helps supported sessions continue. It doesn’t promise zero interruption for every application, and a ping can’t prove voice works. - New primary is healthy, traffic is blackholed. Capture on ingress and egress and check routes, next hops, VLANs, LACP and return routing. A failover uses virtual MACs and gratuitous ARP, so also check the upstream switch’s MAC table. Don’t clear all sessions or switch off security profiles without evidence.
- Secondary unreachable by SSH. Use
execute ha manage, then repair the per-member management path as described above.
Capturing at the packet level is the fastest way to split a firewall problem from a switching one. Our network troubleshooting commands PDF covers the capture basics.
How to failover a FortiGate firewall safely
Test failover on purpose, before an outage does it for you. Don’t pull all the heartbeat cables to do it. Use a documented test method for your exact build, and run it in an isolated lab first.
- Before: backups, console access, the intended primary, a healthy peer, a synchronized config, test clients and a rollback plan.
- During: record the trigger time, the role-change time, packet loss, session behaviour and how long the application takes to recover.
- After: confirm membership, config sync, interfaces, routes, VPNs, application traffic and management access. Repeat in the reverse direction only if your test plan says so.
Agree the acceptable recovery time with the owner of the business system, and don’t promise a universal number. Measure the real thing, such as an ERP login, a payment or a voice call. A calm dashboard and a successful ping are supporting checks, not acceptance. On a production pair, work in a maintenance window with console access and expect some interruption.
These actions change state, so each needs a planned change or a lab: checksum recalculation, forced synchronization, priority or override edits, a reboot, session deletion and a manual failover. An NSE4 lab workbook gives you a cluster where breaking things is safe.
Where does this free PDF stop?
It teaches a method and one two-unit design. It doesn’t give you a cluster to break. Its own scope is a standard two-member active-passive FGCP cluster, so active-active, FGSP, public-cloud HA and FortiGate 6000 and 7000 designs need their own guides. You read the configs here. You don’t run them.
The FortiGate lab workbook with EVE-NG scenarios fills that gap. Chapter 1 covers HA (active-passive and active-active) and firmware management and upgrades. Chapter 4 covers VPN redundancy and failover. You get ready-made EVE-NG topologies, CLI and GUI outputs, verification steps and a free 25-page sample before you decide. Need the lab itself first? Read how to add a FortiGate VM to EVE-NG. New to the platform? Start with What Is FortiGate?.